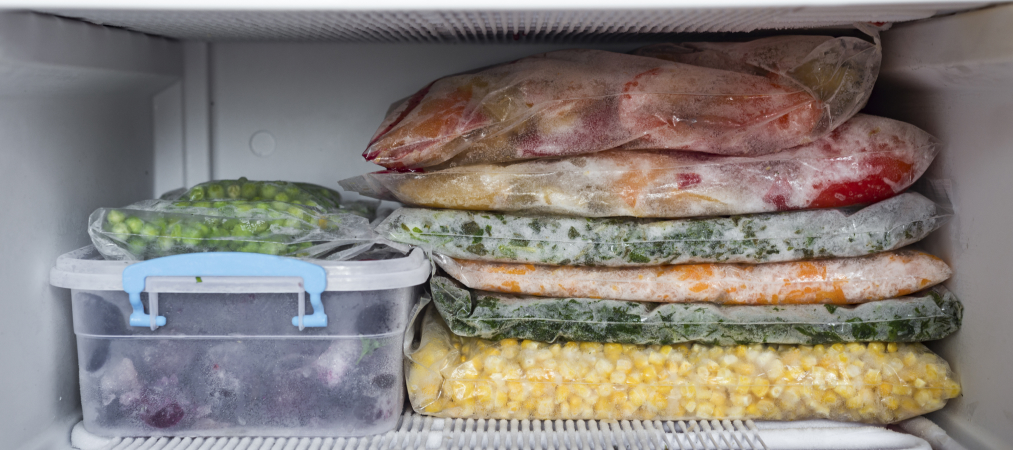
Whether you’re a homeowner or a tenant, the sound of a freezer running constantly can be frustrating and concerning. It’s not only about the noise, but the higher energy consumption, and potential risk of damaging your appliance or spoiling your food. In this comprehensive guide, we will address the reasons why your freezer won’t stop running and provide solutions to these problems.
Reasons for a Freezer Running Continuously
There are numerous reasons why your freezer fan keeps running, ranging from environmental factors to faulty components. Understanding these factors will help you pinpoint the root cause and take appropriate action.
Hot Room Temperature
If your freezer is in a hot environment, it has to work harder to keep the contents frozen. As such, your freezer won’t stop running. To address this issue, consider the following steps:
Assess the room temperature: Check the ambient temperature in the area where your freezer is located. If it exceeds the recommended temperature range (typically around 70°F or 21°C), it can cause the freezer to run constantly. Consider relocating the freezer to a cooler area of your home, away from heat sources such as direct sunlight, ovens, or heating vents.
Improve ventilation: Ensure that the room where your freezer is situated has proper ventilation. Adequate airflow will help dissipate excess heat and relieve the burden on your freezer. Open windows or use fans to improve air circulation. Additionally, avoid placing the freezer against walls or furniture that can obstruct airflow.
Insulate the freezer: If moving the freezer to a cooler location is not feasible, you can help mitigate the impact of a hot room by insulating the appliance. Consider using insulating materials such as foam boards or reflective foil to reduce heat transfer from the surroundings. Be sure to leave space for ventilation around the freezer to maintain proper airflow.
Consider supplementary cooling: In extremely hot climates or during heatwaves, you may need to provide additional cooling support for your freezer. You can use portable fans or air conditioning units to lower the room temperature and ease the workload on your appliance.
Sealed System Leak
A sealed system leak can lead to the refrigerant escaping from your freezer. As the refrigerant reduces, the freezer needs to run more often to keep the contents cold, and this might be why your freezer is running constantly. The sealed system in your freezer is responsible for circulating and containing the refrigerant, which is crucial for maintaining the desired temperatures. If there is a leak in the sealed system, the refrigerant can escape, leading to a decline in cooling efficiency. Here’s what you should do:
Assess signs of a leak: Check for any visible signs of a refrigerant leak, such as oily residue or frost accumulation on the freezer’s components. You may also notice a decrease in cooling performance or the presence of warm spots within the freezer.
Call a professional technician: If you suspect a sealed system leak, it is crucial to contact a professional technician or the manufacturer’s customer service. Sealed system repairs require specialized knowledge and equipment, and attempting to fix it yourself can worsen the issue or void your warranty.
Consider repair or replacement: Depending on the severity of the leak, the technician will evaluate whether a repair or replacement of the sealed system is necessary. In some cases, it may be more cost-effective to replace the entire freezer rather than repairing a complex sealed system.
Consult warranty coverage: If your freezer is still under warranty, review the warranty terms to determine if the sealed system repair or replacement is covered. This can help you save on potential expenses. Be sure to follow the warranty guidelines and procedures provided by the manufacturer.
Temperature Control Thermostat
The temperature control thermostat is the device that regulates the temperature inside your freezer. If it is faulty, it may cause the freezer to run continuously, leading to your freezer fan running continuously. Here’s what you should do:
Check the thermostat setting: Start by verifying that the thermostat is set to the correct temperature. Consult your freezer’s manual or look for temperature recommendations specific to your model. If the thermostat is set too low, the freezer will work harder to reach that temperature, leading to continuous operation.
Test the thermostat accuracy: If you suspect a problem with the thermostat, you can perform a simple test to check its accuracy. Place a thermometer inside the freezer, preferably near the center, and allow it to stabilize for a few hours. Compare the temperature reading on the thermometer with the thermostat setting. If there is a significant discrepancy, it may indicate a faulty thermostat.
Calibration and adjustment: Some thermostats can be calibrated or adjusted to improve accuracy. Refer to your freezer’s manual for instructions on how to calibrate the thermostat. Keep in mind that not all thermostats can be adjusted, so if your model does not have this feature, skip this step.
Replacement of the thermostat: If the thermostat is consistently inaccurate or fails to respond to calibration attempts, it may need to be replaced. Contact the manufacturer or a professional technician to obtain the correct replacement thermostat for your freezer model. Follow the provided instructions or seek professional assistance for proper installation.

Evaporator Fan Motor
The evaporator fan motor circulates the cold air throughout your freezer. If this motor is defective, your freezer won’t stop running as it overworks to compensate. Listen for strange noises or erratic running, which might suggest the motor needs repair or replacement. Here’s what you should do:
Listen for unusual noises: Pay close attention to any strange noises coming from your freezer. A faulty evaporator fan motor may produce unusual sounds such as grinding, squealing, or rattling. These noises can indicate a problem with the motor and should be investigated further.
Observe erratic running: If you notice that the fan runs intermittently or stops and starts unexpectedly, it could be a sign of a defective evaporator fan motor. Erratic running patterns suggest an issue with the motor’s operation, which can lead to continuous running of the freezer.
Check for obstructions: Inspect the area around the evaporator fan motor for any obstructions. Items or debris that block the fan blades can impede its operation and cause it to overwork. Clear away any obstacles to ensure unrestricted airflow.
Test the fan motor: If you suspect a problem with the evaporator fan motor, you can perform a simple test. Turn off the freezer and unplug it from the power source. Locate the fan motor, usually located behind a panel inside the freezer. Gently rotate the fan blades by hand to check for any resistance or stiffness. If the blades don’t spin freely or if you feel any grinding or resistance, the motor may need repair or replacement.
Consult a professional technician: If you encounter issues with the evaporator fan motor or suspect it needs repair or replacement, it is recommended to consult a professional technician. They have the expertise and knowledge to accurately diagnose and resolve motor-related problems. Contact the manufacturer’s customer service or seek recommendations for qualified technicians in your area.
Condenser Fan Motor
The condenser fan motor removes the heat from the compressor and prevents it from overheating. If this fan isn’t working properly, the compressor may run continuously, making your freezer run constantly. Check for abnormal noises or reduced airflow which indicates a faulty fan. Here’s what you should do:
Listen for abnormal noises: Pay attention to any unusual noises coming from the back of your freezer where the condenser fan motor is located. Grinding, squealing, or rattling sounds can indicate a problem with the fan motor. These noises may suggest that the motor is not functioning correctly and needs to be addressed.
Check for reduced airflow: Inspect the area around the condenser fan motor for any obstructions or debris that may restrict airflow. Dust, lint, or other particles can accumulate on the fan blades or the surrounding area, inhibiting proper ventilation. Clean the fan blades and ensure there is no buildup that could impede airflow and cause the fan motor to work inefficiently.
Test the fan motor: Turn off your freezer and unplug it from the power source. Locate the condenser fan motor, usually situated near the compressor at the back of the freezer. Gently rotate the fan blades by hand to check for any resistance or stiffness. If the blades do not spin freely or if you feel any grinding or resistance, it indicates a faulty motor that needs attention.
Inspect the fan motor wiring: Examine the wiring connections of the condenser fan motor. Loose or damaged wiring can prevent the motor from operating correctly. Ensure all connections are secure and there are no visible signs of wire damage or fraying. If you notice any issues, consider consulting a professional technician for repairs or replacement.
Consult a professional technician: If you suspect a problem with the condenser fan motor or if the fan motor is not functioning properly, it is advisable to seek the assistance of a professional technician. They have the expertise to accurately diagnose and resolve issues related to the fan motor, ensuring your freezer operates efficiently.
Defrost Timer
The defrost timer controls the defrost cycle of your freezer. If it is broken, it could be stuck in the cooling mode, making your freezer fan keep running. To test the timer, manually advance it to the defrost cycle. If it doesn’t advance or the freezer doesn’t turn off, the timer may need replacement. Here’s what you should do:
Manually test the defrost timer: Locate the defrost timer, usually found in the control panel of your freezer or near the compressor. Consult your freezer’s manual for its specific location. If accessible, use a flat-head screwdriver or a similar tool to manually advance the timer to the defrost cycle. Observe whether the freezer turns off during the defrost cycle. If the timer doesn’t advance or the freezer fails to turn off, it indicates a potential problem with the defrost timer.
Inspect the defrost timer connections: Check the wiring connections of the defrost timer for any signs of damage or loose connections. Secure any loose wires and ensure they are properly attached to the timer. Damaged or frayed wires may disrupt the functionality of the timer and require professional repairs or replacement.
Consider replacing the defrost timer: If the manual test reveals that the defrost timer is not functioning correctly, it may need to be replaced. Contact the manufacturer or consult a professional technician to obtain the appropriate replacement timer for your freezer model. Follow the provided instructions or seek professional assistance for the installation of the new defrost timer.
Defrost Heater Assembly
The defrost heater assembly is a crucial component responsible for melting the frost that accumulates on the evaporator coils in your freezer. If the defrost heater assembly is not functioning properly, frost can build up excessively on the coils. This forces your freezer to run constantly as it tries to compensate for the reduced cooling efficiency caused by the frost buildup. Here’s what you should do:
Check for frost build-up: Regularly inspect the evaporator coils inside your freezer for any signs of excessive frost accumulation. Open the freezer door and look for a thick layer of frost covering the coils. Excessive frost indicates a potential problem with the defrost heater assembly.
Observe temperature fluctuations: Keep an eye on the temperature inside your freezer. If you notice inconsistent cooling or if the temperature doesn’t reach the desired level, it could be an indication of a malfunctioning defrost heater assembly.
Perform a visual inspection: Visually examine the defrost heater assembly for any visible signs of damage or malfunction. Look for broken or discolored heating elements, loose wires, or any other abnormalities. If you notice any issues, it’s recommended to consult a professional technician for further evaluation and repairs.
Test the defrost heater assembly: To test the functionality of the defrost heater assembly, you can use a multimeter, set to the resistance or continuity mode. Disconnect the power to the freezer and access the defrost heater assembly. Carefully remove the wiring connections from the heater assembly and place the multimeter probes on the terminals of the heater. If the multimeter reading shows infinite resistance or no continuity, it indicates a faulty defrost heater that needs to be replaced.
Defrost Thermostat
This component helps regulate the defrost heater. If the defrost thermostat is faulty, the heater might not work correctly, causing frost buildup and continuous operation of your freezer fan. If the thermostat doesn’t have continuity when it reaches the low temperature limit, it likely needs to be replaced. Here’s what you should do:
Test the defrost thermostat: Disconnect the power to your freezer and access the defrost thermostat, usually located on the evaporator coils or near the freezer’s cooling system. Using a multimeter set to the continuity or resistance mode, check the continuity of the defrost thermostat. If the thermostat does not have continuity when it reaches the low temperature limit, it indicates a faulty thermostat that needs to be replaced.
Replace the defrost thermostat: If the test confirms a faulty defrost thermostat, contact the manufacturer or a professional technician to obtain the correct replacement part. Follow the provided instructions or seek professional assistance for the proper installation of the new defrost thermostat.
Door Not Fully Closing
If your freezer door isn’t fully closing, warm air can infiltrate and disrupt the internal temperature, causing your freezer to run constantly. Follow these steps to address the issue:
Inspect the door seal: Check the condition of the door gasket or seal. Look for signs of wear, tears, or damage that may prevent the door from sealing properly. Clean the gasket with mild soapy water and ensure it is free from any debris or food particles that may hinder a tight seal.
Remove obstructions: Examine the area around the freezer door for any obstructions or objects that may prevent the door from closing completely. Move any items that are blocking the door or hindering its proper closure.
Adjust the door hinge: If the door appears misaligned or doesn’t close evenly, it may require adjustment. Consult your freezer’s manual or manufacturer’s instructions for guidance on how to adjust the door hinge properly.
Dirty Condenser Coils
Dirty condenser coils can’t dissipate heat efficiently, making the freezer run constantly as it works harder. Regularly clean these coils using a coil brush or vacuum to ensure efficient operation.
Main Control Board
While it is uncommon, a defective main control board can occasionally cause the freezer fan keeps running continuously. The main control board is responsible for regulating various functions of the freezer, including the operation of the fan. However, it is important to note that other components are typically more likely to be the cause of the issue. Therefore, before considering a replacement of the main control board, it is recommended to inspect and address any issues with other parts mentioned in this article. By troubleshooting and addressing potential problems with other components, you can ensure an accurate diagnosis and appropriate repairs or replacements.
Closing Cam
The closing cam helps close the door securely. If it is worn out, the door may not seal properly, causing your freezer to run continuously. You can check if the door closes properly and replace the cam if necessary. To address this issue, follow these steps:
Inspect the closing cam: Carefully examine the closing cam, which is usually located at the bottom of the freezer door. Look for signs of wear, cracks, or other damage. A worn-out closing cam may not properly engage with the door hinge, preventing the door from closing fully.
Test the door closure: Close the freezer door and observe whether it closes tightly and securely. Pay attention to any gaps or misalignment that may indicate a problem with the closing cam. If the door does not close properly, it is likely that the closing cam needs to be replaced.
Thermistor
The thermistor is a temperature-sensitive component that monitors the freezer’s internal temperature and sends the readings to the main control board. If the thermistor becomes faulty, it can send incorrect temperature readings, causing the freezer fan to run continuously. To determine if the thermistor is the cause of the issue, follow these steps:
Locate the thermistor: The thermistor is typically located near the evaporator coils or inside the freezer compartment. Consult your freezer’s manual or manufacturer’s instructions for its specific location.
Disconnect power and access the thermistor: Ensure the freezer is turned off and unplugged from the power source before proceeding. Access the thermistor by removing any necessary panels or covers.
Test the thermistor: Use a multimeter set to the resistance or continuity mode to check the thermistor. Disconnect the wiring connectors from the thermistor and place the multimeter probes on the thermistor’s terminals. The multimeter reading should indicate a specific resistance value within the acceptable range specified by the manufacturer. If the reading is outside this range or shows no continuity, it suggests a faulty thermistor that needs to be replaced.
Control Board
In addition to the main control board, there is another component known as the control board that can potentially cause issues if it is not functioning correctly. Similar to the main board, it is recommended to check other components mentioned in this article before considering a replacement for the control board. By systematically inspecting and addressing potential problems with other parts, you can ensure an accurate diagnosis and appropriate repairs or replacements.
User Control and Display Board
The user control and display board manage the various functions of the freezer. If this board is malfunctioning, it could lead to your freezer running constantly. Here’s what you should do:
Check for signs of damage: Inspect the user control and display board for any visible signs of damage or malfunction. Look for cracked or broken buttons, flickering or unresponsive display, or any other abnormalities. These issues can indicate a problem with the board.
Reset the control board: Sometimes, a simple reset can resolve minor issues with the user control and display board. Consult your freezer’s manual or manufacturer’s instructions to find the appropriate steps for resetting the control board. This may involve unplugging the freezer from the power source, waiting for a few minutes, and then plugging it back in.
Perform a functional test: Test the different functions and settings of the user control and display board to ensure they are working correctly. Adjust the temperature settings, activate different modes, and monitor if the changes are reflected accurately on the display. If you notice any irregularities or inconsistencies, it may indicate a malfunctioning control board.
Consult a professional technician: If you suspect a problem with the user control and display board or encounter difficulties during testing, it is advisable to seek the assistance of a professional technician. They have the expertise to accurately diagnose the issue and provide the necessary repairs or replacements for the control board.
Door Gasket
To address this issue, follow these steps:
Inspect the door gasket: Carefully examine the door gasket for any signs of wear and tear, cracks, or deformations. Check along the entire perimeter of the gasket, including the corners and edges. A faulty door gasket may appear loose, torn, or compressed in certain areas.
Check for proper alignment: Close the freezer door and observe if it aligns evenly with the freezer cabinet. Ensure that the gasket is in contact with the cabinet all the way around. Misalignment or gaps may indicate a problem with the door gasket.
Test the seal: Perform a simple test to check the seal of the door gasket. Insert a piece of paper or a dollar bill between the closed door and the gasket. Close the door firmly and attempt to pull out the paper or bill. If you can easily remove it without resistance, it suggests a weak or ineffective seal.
A freezer running constantly is a common issue that can arise due to several reasons. From simple fixes like cleaning the condenser coils or ensuring the door is fully closed, to more complex problems involving component failure, addressing these issues will ensure your freezer works efficiently and quietly. As always, when in doubt, consult with a professional to prevent further damage to your appliance.