Common Problems of a Refrigerator Water Dispenser
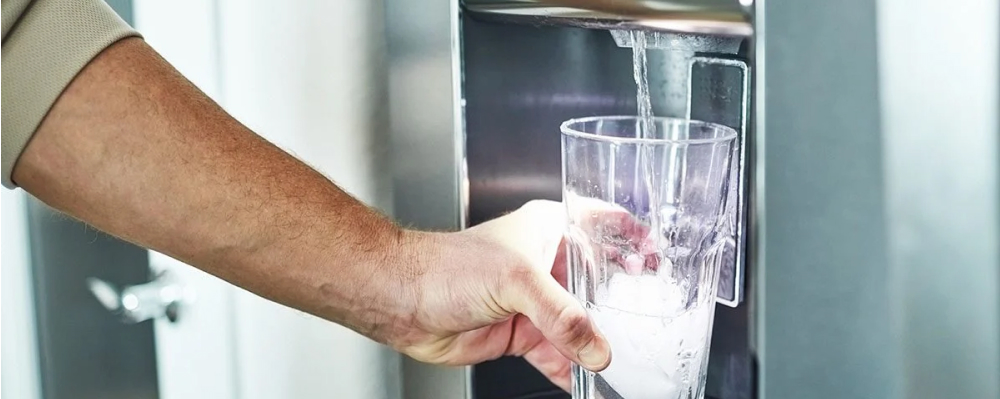
Having a fridge water dispenser slow can be a frustrating issue. If you’ve noticed problems such as refrigerator water dispenser slow, fridge water slow after changing filter, or fridge water slow, you’re not alone. These are common issues that many homeowners and tenants face. In this article, we’ll explore the possible causes behind these problems and provide practical solutions to help you address them effectively.
Check the Water and Ice Filter
One of the first things you should do when experiencing a fridge water dispenser slow is to check the water and ice filter. Over time, these filters can become clogged with impurities, reducing the water pressure and flow rate. Follow these steps to check and replace the water and ice filter:
Locate the filter: The water and ice filter is typically located inside the refrigerator compartment or in the grille at the base of the fridge. Refer to your refrigerator’s manual for the exact location.
Remove the filter: Depending on the model, you may need to twist, unscrew, or push a button to remove the filter. Follow the manufacturer’s instructions to safely remove the filter.
Inspect the filter: Examine the filter for any signs of dirt, debris, or discoloration. If it appears dirty or hasn’t been replaced in the last six months, it’s likely time for a new one.
Purchase a replacement filter: Visit your local appliance store or order a compatible replacement filter online. Make sure to choose the correct filter model for your refrigerator.
Install the new filter: Follow the manufacturer’s instructions to properly install the new filter. Typically, you will need to align the filter correctly and twist or push it into place until it locks securely.
Flush the filter: After installing the new filter, run water through it for a few minutes to flush out any carbon residue or air pockets. This will help ensure a steady water flow.
Inspect the Water Inlet Valve
Another possible cause of a fridge water dispenser slow or refrigerator water dispenser leaking is a faulty water inlet valve. The water inlet valve controls the water flow into the fridge and dispenser. If it becomes defective or clogged, it can result in reduced water pressure or even water leaks. Follow these steps to inspect and potentially resolve issues with the water inlet valve:
Locate the water inlet valve: The water inlet valve is usually located at the back of the refrigerator, near the bottom. It is connected to the water supply line.
Shut off the water supply: Before inspecting the valve, it’s important to shut off the water supply to the refrigerator. Locate the shut-off valve connected to the water line and turn it clockwise until it is fully closed.
Disconnect the water inlet valve: Once the water supply is shut off, disconnect the water inlet valve from the water supply line. You may need a wrench or pliers to loosen and remove any connecting nuts or fittings.
Inspect the valve for damage or debris: Carefully examine the water inlet valve for any signs of damage, such as cracks, leaks, or corrosion. Additionally, check for any debris or mineral buildup that may be blocking the water flow. If there is significant damage or clogging, it’s recommended to replace the valve.
Clean the valve if necessary: If the valve appears dirty or clogged, you can try cleaning it to restore proper functionality. Gently brush away any debris using a soft brush. Avoid using harsh chemicals or abrasive materials that could damage the valve.
Turn on the water supply: Once the new valve is installed or if you have cleaned the existing valve, turn on the water supply by opening the shut-off valve counterclockwise. Make sure the valve is fully open to allow the proper water flow.

Troubleshoot the Water Dispenser Actuator
If your refrigerator’s water dispenser is not working at all, the issue may lie with the water dispenser actuator. The actuator is the part responsible for activating the dispenser when you press on the lever or button. Over time, it can wear out or become misaligned, leading to problems with water flow. Follow these steps to troubleshoot and potentially resolve issues with the water dispenser actuator:
Inspect the actuator: Begin by carefully examining the water dispenser actuator for any visible signs of damage, such as cracks, breaks, or wear. Additionally, check if it is properly aligned with the lever or button that activates the dispenser. Misalignment can prevent the actuator from functioning correctly.
Realignment: If the actuator appears misaligned, you can attempt to adjust it to its proper position. Refer to your refrigerator’s manual or contact the manufacturer for specific instructions on how to realign the actuator. Typically, this involves gently manipulating the actuator and ensuring it engages with the lever or button correctly.
Test the dispenser: After realigning the actuator, test the water dispenser by pressing on the lever or button. If the water flows smoothly, the issue may have been resolved. However, if the problem persists, proceed to the next step.
Examine the Micro Switch
The micro switch is another crucial component that ensures the proper functioning of your refrigerator’s water dispenser. It plays a vital role in detecting the pressing of the actuator and sending a signal to release the water flow. However, if the micro switch is faulty or stuck, it can lead to issues such as fridge water dispenser dripping or refrigerator water dispenser dripping. Follow these steps to examine and potentially resolve problems related to the micro switch:
Unplug the refrigerator: Before inspecting the micro switch, ensure that the refrigerator is unplugged from the power source. This precautionary measure is essential for your safety during the examination process.
Access the micro switch: Locate the control panel of your refrigerator, typically located on the front or top of the unit. Depending on the model, you may need to remove a cover or access panel to reach the micro switch. Refer to your refrigerator’s manual for specific instructions on accessing the micro switch.
Inspect the micro switch: Once you have accessed the micro switch, carefully examine it for any signs of damage, such as cracks, corrosion, or loose connections. Additionally, check for any debris or obstructions that may be preventing the switch from functioning correctly. If any issues are detected, proceed to the next step.
Clean the micro switch: If the micro switch appears dirty or obstructed, cleaning it may resolve the problem. Use a soft cloth or a cotton swab dipped in a mild cleaning solution, such as isopropyl alcohol, to gently clean the switch. Take care not to apply excessive force or use abrasive materials that could damage the switch.
Assess the Dispenser Control Board
In some cases, a malfunctioning dispenser control board can be the cause of water dispenser problems. The control board regulates various functions, including water flow and ice production. If it becomes damaged or develops a fault, it can lead to issues with water flow or inconsistent performance. To diagnose a faulty control board, consult your refrigerator’s manual or contact the manufacturer for guidance. If the control board is indeed the problem, it may need to be repaired or replaced by a professional technician.
Investigate the Water Line for Freezing
If your refrigerator is located in an environment with low temperatures or the freezer temperature is set too low, it can result in the water line leading to the dispenser freezing. This can cause a significant reduction in water flow or even a complete blockage. Follow these steps to investigate and resolve issues related to a frozen water line:
Check the freezer temperature: Begin by checking the temperature settings of your freezer. Ideally, the temperature should be set between 0 to 5 degrees Fahrenheit (-18 to -15 degrees Celsius). If the temperature is set too low, adjust it to a slightly higher setting to prevent the water line from freezing.
Inspect the water line: Carefully examine the water line leading to the dispenser for any signs of freezing. Look for ice or frost buildup along the length of the line. Common areas where freezing can occur include near the back of the refrigerator or where the water line enters the freezer compartment.
Thaw the water line: If you observe ice or frost buildup, it’s necessary to thaw the water line to restore proper water flow. There are two common methods to thaw the line:
- Hairdryer method: Using a hairdryer set to low heat, direct the warm airflow along the frozen section of the water line. Move the hairdryer back and forth, maintaining a safe distance from the line, until the ice or frost melts. Take care not to overheat the line or apply excessive heat to avoid damage.
- Warm towel method: Alternatively, you can place a warm towel around the frozen portion of the water line. Allow the warmth from the towel to gradually thaw the ice or frost. Check the towel periodically and replace it with a fresh warm towel if needed. Be patient, as this method may take some time to fully thaw the line.
Monitor the water flow: After thawing the water line, check the water dispenser to ensure that the water flow has improved. Run water through the dispenser for a few minutes to flush out any remaining ice particles or air pockets. The water flow should return to normal once the line is completely thawed.
Prevent future freezing: To prevent the water line from freezing again, consider the following measures:
- Adjust the freezer temperature: Ensure that the freezer temperature is set within the recommended range of 0 to 5 degrees Fahrenheit (-18 to -15 degrees Celsius).
- Check for cold air leaks: Inspect the refrigerator and freezer compartments for any gaps or cracks that may be allowing cold air to escape. Seal any leaks with appropriate insulation materials to maintain consistent temperatures.
- Ensure proper ventilation: Make sure that the refrigerator has adequate airflow around it. Avoid blocking the vents with items or placing the refrigerator too close to walls, which can restrict proper ventilation and lead to temperature imbalances.
Check the Dispenser Tube
The dispenser tube plays a critical role in connecting the water reservoir to the dispenser in your refrigerator. Over time, it can become kinked or blocked, resulting in restricted water flow from the dispenser. To address this issue, follow these steps to check and rectify any problems with the dispenser tube:
Locate the dispenser tube: The dispenser tube is typically located at the back of the refrigerator, near the water reservoir and dispenser area. It is a clear or translucent tube that carries water from the reservoir to the dispenser.
Inspect for bends, kinks, or obstructions: Carefully examine the dispenser tube for any bends, kinks, or obstructions along its length. Check for sharp bends or twists that may restrict water flow. Look for any debris, sediment, or mineral deposits that could cause blockages. If you identify any issues, proceed to the next step.
Straighten the tube: If the dispenser tube is kinked or bent, gently straighten it out to restore the proper water flow. Take care not to apply excessive force or create additional stress on the tube, as it may lead to leaks or damage.
Remove blockages: If you find any obstructions, such as debris or mineral buildup, carefully remove them. Use a soft cloth or a small brush to clean the inside of the tube. If the blockage is stubborn, you can try using a thin, flexible wire or pipe cleaner to gently dislodge it. Take caution not to damage the tube while removing the blockage.
Test the water flow: After straightening the tube and removing any obstructions, test the water dispenser to check if the water flow has improved. Press the lever or button to activate the dispenser and observe the water flow. It should be steady and without any significant reduction in pressure.
Monitor for leaks: While testing the water flow, closely monitor the dispenser tube for any signs of leaks. Ensure that all connections are tight and secure. If you notice any leaks, it may indicate a problem with the tube or its fittings, and you may need to seek professional assistance for repairs.
Clean the Water Lines of Your Fridge
Over time, mineral deposits and sediment can accumulate in the water lines of your fridge, resulting in reduced water flow and potentially affecting the taste of the water. To ensure optimal water flow and improve the quality of the water from your refrigerator dispenser, it’s important to clean the water lines regularly. Follow these steps to clean the water lines effectively:
Prepare the cleaning solution: Create a mixture of equal parts water and vinegar. The vinegar’s acidity helps dissolve mineral deposits and remove sediment from the water lines. You can use white vinegar or apple cider vinegar for this purpose.
Disconnect the water supply: Before cleaning the water lines, it’s crucial to disconnect the water supply to the refrigerator. Locate the shut-off valve connected to the water line and turn it clockwise to close it. This prevents any water flow during the cleaning process.
Access the water inlet tube: Locate the water inlet tube, which is usually located at the back of the refrigerator, near the bottom. This is where the water line connects to the refrigerator. Use caution and refer to your refrigerator’s manual for specific instructions on accessing the water inlet tube, as it may vary depending on the model.
Pour the cleaning solution: Once you have access to the water inlet tube, use a funnel to pour the vinegar solution into the tube. Ensure that the funnel is securely inserted into the tube to prevent any spills. The vinegar solution will flow through the water lines, dissolving mineral deposits and sediment along the way.
Allow the solution to sit: Let the vinegar solution sit in the water lines for about ten minutes. This allows the acidity of the vinegar to break down and loosen any accumulated deposits.
Flush with clean water: After the solution has had time to work, flush the water lines with clean water. You can do this by reconnecting the water supply and running water through the dispenser for a few minutes. This helps remove any remaining vinegar solution and loosened debris from the water lines.
Monitor water flow and quality: Once the water lines have been flushed, observe the water flow and taste. You should notice an improvement in both the flow rate and the quality of the water. If necessary, repeat the cleaning process to achieve desired results.
Reconnect the water supply: After cleaning and ensuring satisfactory water flow and quality, reconnect the water supply by turning the shut-off valve counterclockwise. Verify that the valve is fully open to allow the proper water flow to the refrigerator.

Inspect the Water Filter
As mentioned earlier, the water filter in your refrigerator plays a crucial role in maintaining clean and healthy drinking water. It helps remove impurities, contaminants, and unpleasant odors, ensuring that the water from your fridge dispenser is of high quality. Regularly inspecting the water filter is essential to ensure its effectiveness. Follow these steps to inspect and maintain the water filter:
Locate the water filter: The water filter is typically located inside the refrigerator compartment or in the grille at the base of the fridge. Refer to your refrigerator’s manual or manufacturer’s instructions to determine the exact location of the water filter in your specific model.
Check for signs of dirt or clogging: Carefully examine the water filter for any visible signs of dirt, sediment, or discoloration. If the filter appears dirty or clogged, it may indicate that it has reached its maximum capacity and is no longer effectively filtering the water. In such cases, it’s advisable to replace the filter.
Consider the recommended replacement interval: Most refrigerator manufacturers recommend replacing the water filter every six months. However, this interval can vary depending on factors such as usage, water quality, and the specific refrigerator model. Consult your refrigerator’s manual or manufacturer’s guidelines to determine the recommended replacement interval for your water filter.
Verify Proper Water Pressure
In some instances, the water pressure from your home’s water supply may be too low, which can directly impact the water flow from your refrigerator dispenser. To ensure optimal performance, it’s important to verify the water pressure. Follow these steps to check and address any issues with water pressure:
Use a pressure gauge: A pressure gauge is a handy tool that allows you to measure the water pressure accurately. Attach the gauge to an outdoor faucet or a designated hose bib near your water supply. Follow the manufacturer’s instructions to obtain an accurate reading of the water pressure.
Consult a professional plumber: If you’re unsure about using a pressure gauge or need assistance, consider consulting a professional plumber. They have the expertise and specialized equipment to measure the water pressure accurately and provide guidance on resolving any issues.
Determine if the pressure is too low: Compare the measured water pressure to the recommended range for residential water systems, which is typically between 40 to 60 pounds per square inch (psi). If the pressure falls below this range, it may explain the reduced water flow from your refrigerator dispenser.
Install a water pressure booster: If the water pressure is consistently low, you can consider installing a water pressure booster. A booster pump can increase the water pressure to the desired level, ensuring adequate flow to your refrigerator dispenser. Consult a professional plumber or a knowledgeable technician for assistance with selecting and installing a suitable booster pump.
Contact your local water utility company: If you’re experiencing persistently low water pressure throughout your home, it may be worth contacting your local water utility company. They can assess the overall water supply in your area and determine if there are any issues or restrictions that could be affecting the water pressure. They may provide guidance or offer solutions to improve the water pressure.
A fridge water dispenser slow or malfunctioning water dispenser in your refrigerator can be frustrating, but by understanding the common problems and their solutions, you can quickly address the issues. Remember to check the water and ice filter, inspect the water inlet valve, troubleshoot the water dispenser actuator, examine the micro switch, assess the dispenser control board if needed, and investigate the water line for freezing. Additionally, consider checking the dispenser tube, cleaning the water lines, inspecting and replacing the water filter, and verifying proper water pressure.