Discovering your electric oven mysteriously turned on by itself can be a perplexing and potentially hazardous situation. Understanding the possible causes, taking immediate safety precautions, and knowing how to troubleshoot and repair the issue are vital for both the safety of your home and your peace of mind. In this comprehensive guide, we delve deep into the intricacies of an oven that spontaneously activates, exploring common reasons behind this phenomenon, detailing essential safety measures, offering a comprehensive troubleshooting process, and providing step-by-step repair solutions.
Immediate Steps to Take
When you stumble upon your oven operating without any input or command, swift action is imperative to ensure safety and prevent potential hazards. Depending on the type of oven you have, consider one of the following actions:
- For electric ovens: It’s crucial to promptly switch off the oven’s circuit breaker. This step will cut off the power supply to the oven, preventing it from heating up unexpectedly and reducing the risk of fires or other accidents.
- For gas ovens: If you have a gas oven, turn off the gas supply immediately. This precaution not only stops the oven from heating but also eliminates any risk associated with a gas leak.
- Unplug the oven: For all types of ovens, unplugging it from the electrical outlet ensures complete deactivation. This step is a failsafe method to prevent any further operation.
Taking these immediate measures is essential not only for safety but also for conserving energy and preventing any potential damage to your appliance.
Common Causes and Signs
Understanding the root causes behind your oven’s spontaneous activation is the first step in resolving this puzzling issue. Here are the common causes and the signs associated with them:
Electrical Malfunctions
- Sudden Activation: Your oven may unexpectedly turn on without any user input or programming. This unusual behavior disrupts your routine and poses significant safety concerns.
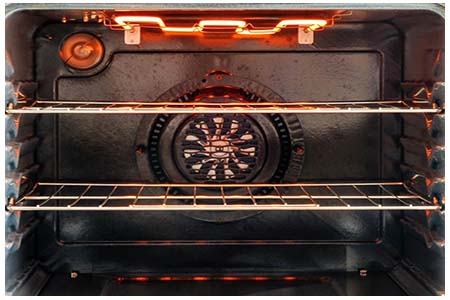
Signs: The oven’s heating elements may ignite, and the interior may become hot. In some cases, you might notice the oven’s display or control panel lights up without any prompting. - Flickering Lights: In some instances, the oven’s interior or control panel lights may flicker or behave erratically. These visual cues can be indicative of underlying electrical irregularities.
Signs: The lights inside the oven may flash or dim unexpectedly. On the control panel, you may observe the digital display flickering or displaying garbled information. - Tripped Circuit Breaker: Frequent tripping of the circuit breaker or blown fuses when using the oven are clear indicators of electrical problems. While circuit protection is designed to prevent severe issues, identifying and addressing the root cause is crucial.
Signs: You may experience power interruptions in your home as the circuit breaker trips. This disruption can affect other appliances connected to the same electrical circuit. - Unusual Noises: Pay close attention to any strange electrical sounds coming from the oven, such as buzzing, humming, or clicking sounds. These noises may accompany spontaneous activation and warrant immediate investigation.
Signs: The unusual noises may be intermittent or continuous, and they can vary in intensity. They often emanate from the control panel or the rear of the oven.
Faulty Timer or Thermostat
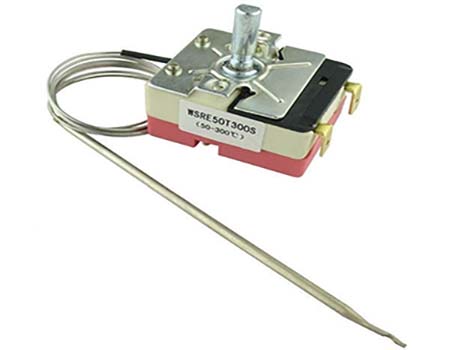
Oven Thermostat
- Inaccurate Temperature: Inconsistent temperature regulation can lead to uneven cooking or require longer cooking times. This issue impacts the quality of your meals and can pose safety risks if it results in undercooked or overcooked dishes.
Signs: Food prepared in the oven may come out unevenly cooked, with some portions overdone while others remain undercooked. You may need to adjust cooking times frequently to compensate for temperature inaccuracies. - Timer Malfunctions: Timer-related problems can lead to overcooking, undercooking, or unexpected oven activation. Such inconsistencies are not only frustrating but can also disrupt your cooking routine.
Signs: The oven’s timer may not work as expected, failing to sound an alert when the set cooking time elapses. Alternatively, it may activate the oven at unpredictable moments. - Delayed Start Issues: If your oven includes a delayed start feature, it may activate unexpectedly or fail to start at the scheduled time. Such inconsistencies can be highly inconvenient.
Signs: You may set the oven to start cooking at a specific time, but it either begins prematurely or does not start at all, causing disruptions to your meal planning. - Unresponsive Controls: The oven’s control panel, including buttons and digital displays, may not respond as expected. This can hinder your ability to operate the oven effectively and safely.
Signs: When you press buttons on the control panel, they may not register any action, or there might be a delay in their response. The digital display may show incorrect information or remain blank.
Environmental Factors
- Power Surges: Recent power surges or fluctuations in your home’s electrical supply may have affected the oven’s operation. These events can introduce unexpected issues and warrant further investigation.
Signs: You might notice that multiple electronic devices in your home, including the oven, are affected by power surges. Damage or malfunctions could occur simultaneously in these devices. - Interference: Nearby electronic devices or appliances emitting electromagnetic interference could disrupt the oven’s operation. Ensuring that the oven is placed away from such interference sources can help mitigate this problem.
Signs: Oven activation may coincide with the use of other electronic devices, such as microwaves, cordless phones, or wireless routers. Electromagnetic interference can lead to erratic oven behavior. - Pest Infestation: Damage caused by pests, particularly rodents, can lead to electrical issues within the oven. Chewed wires or nesting materials inside the appliance can trigger erratic behavior.
Signs: Evidence of a pest infestation in or around the oven can include chewed wires, droppings, or nesting materials. These signs often indicate that rodents or insects are the culprits. - Software and Firmware Issues: Some ovens are equipped with software or firmware that may occasionally malfunction, causing the oven to behave unexpectedly. Checking for available updates can help address such issues.
Signs: Software or firmware issues may manifest as glitches in the oven’s operation. You might observe unresponsive controls, unexpected activations, or other erratic behavior.
Troubleshooting and Repair

Note: Prioritize safety by disconnecting the oven from its power source (unplug it or turn off the circuit breaker) before attempting any repairs.
Step 1: Diagnose the Issue
- Observe the Behavior: Start by carefully observing when and how the oven turns on by itself. Are there specific patterns or circumstances that trigger this behavior? Understanding the context can assist in pinpointing the cause.
- Check for Error Codes: If your oven displays error codes, make a note of them. Error codes can provide valuable information for diagnosing and resolving the issue. Think of them as the oven’s way of communicating the nature of the problem.
Step 2: Inspect the Oven
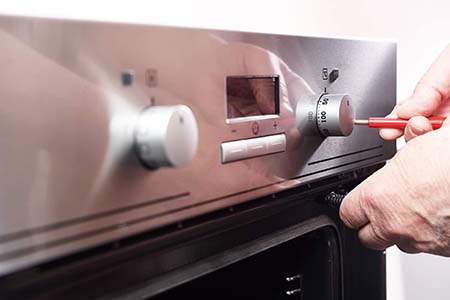
- Inspect the Control Panel: Examine the oven’s control panel for visible damage, loose buttons, or a malfunctioning display. Physical examination can reveal issues that require attention.
- Check Wiring and Connections: Carefully scrutinize the oven’s wiring and connections for any signs of damage, fraying, or loose wires. Ensure all connections are secure. Damaged wiring is a common culprit in electrical malfunctions.
- Internal Inspection: If it’s safe and within your expertise, remove access panels or covers to inspect internal components. Look for signs of damage, overheating, or pest infestations that may not be visible from the outside.
Step 3: Test and Troubleshoot
- Test the Control Panel: Ensure control panel responsiveness by systematically pressing buttons and checking for erratic behavior. If buttons are unresponsive or behave unpredictably, it may be a sign that they need cleaning, repair, or replacement.
- Thermostat and Timer Testing: If you suspect thermostat or timer issues, employ a multimeter to test them for proper functionality. This diagnostic step can help confirm whether these components are contributing to the problem.
- Software Updates: Investigate whether your oven has software or firmware updates available to resolve known issues. Manufacturers often release updates to improve functionality and address glitches. Consult the manufacturer’s website or customer support for guidance.
Step 4: Address Electrical Issues
- Fix Faulty Wiring: If you find damaged wiring during your inspection, replace it with wires of the same gauge. Ensure all connections are well-insulated and securely fastened. Properly addressing wiring problems is crucial for long-term safety.
- Replace Damaged Components: Identify and replace malfunctioning components, such as a thermostat, timer, or control board, following the manufacturer’s recommendations. Replacing faulty components can restore the oven’s proper operation.
Step 5: Preventive Measures
- Prevent Future Pest Infestations: Take proactive pest control measures to deter rodents or insects from causing further damage. Seal any entry points around the oven and regularly inspect for signs of infestation.
- Install Surge Protectors: To safeguard your oven from power surges, consider installing surge protectors on electrical outlets. These devices can help protect sensitive electronic components from voltage spikes.
Step 6: Reassemble and Test
- Reassemble the Oven: If you disassembled the oven for inspection or repair, carefully reassemble all components. Ensure that everything is put back in its place securely.
- Test the Oven: Reconnect the power source and test the oven to ensure it operates as expected. Monitor it for any unusual behavior or signs of spontaneous activation. A successful test indicates that the issue has likely been resolved.
Step 7: Regular Maintenance
- Routine Cleaning: Implement routine cleaning of the oven’s interior to prevent the buildup of debris or residues that could affect its operation. A clean oven functions more efficiently and reliably.
Step 8: Document and Monitor
- Keep Records: Maintain detailed records of the steps you’ve taken, including any repairs or component replacements. These records can be invaluable for future reference or warranty claims.
- Monitor the Oven: Continue to monitor the oven’s behavior over time to ensure that the issue remains resolved. Regular checks help detect any recurrent problems promptly.
Step 9: Seek Professional Help If Needed
- Consult a Technician: If the problem persists or if you’re uncertain about any repair steps, it’s advisable to consult a professional appliance technician for further diagnosis and repair. Technicians have the expertise and specialized tools to address complex issues safely and effectively.
Important Safety Note: If you are not comfortable with any of the steps or if the issue involves complex electrical components, it’s safer to seek professional assistance from a qualified technician. Working with electricity can be hazardous, and safety should always be a priority.