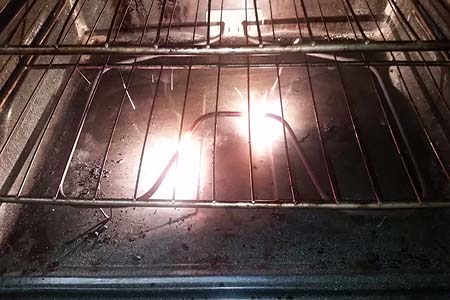
Oven coil sparking is not just an unsightly spectacle; it can signify underlying issues that need your attention. In this comprehensive guide, we delve into the world of oven coil sparking, exploring its common causes, diagnosis methods, and how to effectively address this phenomenon. Let’s unravel the intricacies of oven coil sparking and understand why it’s a matter of significance.
Immediate Steps To Take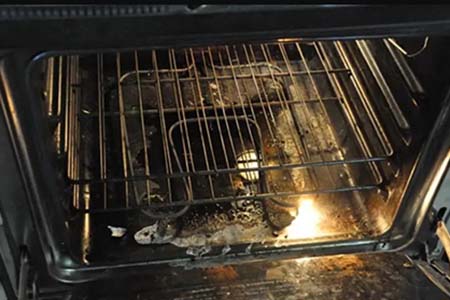
Disconnect Power: Always start by disconnecting the oven from the electrical outlet or turning off the circuit breaker dedicated to the oven. Ensure there is no power supply before proceeding with any work.
- Gather Tools and Materials: Ensure you have the necessary tools and materials on hand before starting any repair work. Common tools may include screwdrivers, pliers, wire cutters, wire strippers, and a multimeter for testing electrical connections. Additionally, have replacement parts ready if needed, such as heating elements or wires.
- Refer to the Oven Manual: Consult the oven’s user manual or service manual for guidance on disassembly, component location, and safety precautions. This will provide essential information for your repair.
- Safety Precautions: Prioritize safety by wearing personal protective equipment (PPE), including gloves and safety goggles, to protect against electrical hazards and hot oven components.
- Disconnect Power: Before beginning any repair work, disconnect the oven from the electrical outlet or turn off the circuit breaker dedicated to the oven to ensure there is no power supply.
- Create a Safe Workspace: Clear the area around the oven and create a safe workspace. Ensure good lighting to see components clearly.
- Prepare for Disassembly: If necessary, prepare the oven for disassembly by removing any covers, panels, or access doors that will provide access to the heating elements and wiring. Follow the instructions in the manual for disassembly.
- Label Wires and Components: Before removing any wires or components, use labels or masking tape to mark their positions and connections. This will help ensure correct reassembly.
- Document Component Placement: Take photos or make diagrams of the oven’s interior, noting the placement of components and wires. This will be valuable for reassembly.
- Inspect for Obstructions: Inspect the area around the sparking coil for any obstructions or foreign objects that may have caused the sparking. Remove any debris.
- Have Fire Safety Equipment Ready: As a precaution, have a fire extinguisher nearby in case of any unexpected fire-related incidents.
- Plan the Repair: Mentally walk through the repair process and ensure you have a clear plan of action. If you’re not confident in your ability to perform the repair safely and effectively, consider seeking professional assistance.
Common Causes: Exploring the Culprits Behind Oven Coil Sparking
Dirty Oven Conditions
Dirty oven conditions can lead to sparking due to:
- Accumulated Food Residue: Over time, food particles, grease, and residue can accumulate on the oven’s interior surfaces, including the heating elements. When these residues come into contact with the hot elements, they can ignite and create sparks.
- Uneven Heating: Food residue buildup can disrupt the even distribution of heat within the oven. This can cause certain areas of the heating elements to heat up more than others, potentially leading to overheating and sparking.
- Increased Heat Retention: Food residues can act as insulators, trapping heat and preventing it from dissipating effectively. This can result in higher temperatures near the heating elements, increasing the risk of sparks.
Damaged Heating Elements
Damaged heating elements can spark due to:
- Exposed Wires: When the heating elements develop cracks, breaks, or deteriorate, it can expose wires or conductive components. These exposed areas can generate sparks when electricity flows through them.
- Hotspots: Damage to the heating element can create localized hotspots. These areas can become excessively hot, leading to arcing or sparking.
Faulty Wiring Systems

Faulty wiring systems within the oven can contribute to sparking through:
- Loose Connections: Loose or improperly connected wires can create electrical arcing when electricity flows through them. Loose wires can generate sparks when they make intermittent contact.
- Damaged Insulation: If the insulation around the wires becomes compromised, it can expose the conductive wires to other components. When exposed wires come into contact with metal parts, it can result in sparking.
Moisture or Food Residue Buildup
Moisture or food residue buildup can cause sparking by:
- Rapid Temperature Changes: When moisture or food residue comes into contact with the hot oven coil, it can lead to rapid temperature changes. These sudden temperature fluctuations can create conditions conducive to sparking.
- Conductive Properties: Some types of food residue, when dry, can become conductive. If these substances come into contact with the oven coil or other electrical components, they can create electrical pathways, leading to sparking.
Loose Electrical Connections
Loose electrical connections can result in sparking because:
- Intermittent Contact: Loose connections can lead to intermittent electrical contact. When the connection is temporarily established or broken, it can produce electrical arcing and sparks.
- High Resistance: Loose connections can also increase electrical resistance, leading to localized heating. This can create conditions for sparking, especially in areas where the connection is weakest.
Step-by-Step Guide to Identifying the Sparking Source
When you encounter sparking in your oven coil, a systematic approach to identification is crucial. Follow these steps to pinpoint the source of the issue:
Visual Inspection Techniques
Begin with a visual examination of your oven’s interior and components:
- Heating Elements: Inspect the heating elements for visible damage, such as cracks, breaks, or exposed wires. Pay close attention to any discoloration, as it may indicate overheating.
- Wiring and Connections: Examine all wires and connections for signs of damage, loose connections, or exposed conductive parts. Look for areas where wires may have come into contact with the oven’s interior.
- Control Panel: Check the control panel, buttons, and digital displays for any irregularities or visible damage. Malfunctioning control panels can contribute to sparking.
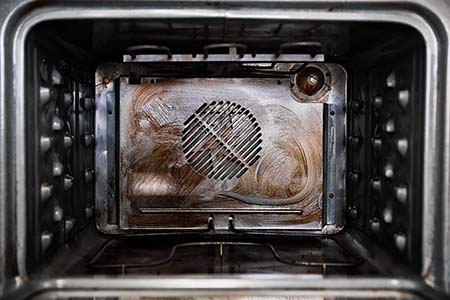
- Interior Surfaces: Inspect the interior surfaces of the oven for food residue, grease buildup, or foreign objects that could come into contact with the coil and cause sparking.
Testing the Health of Heating Elements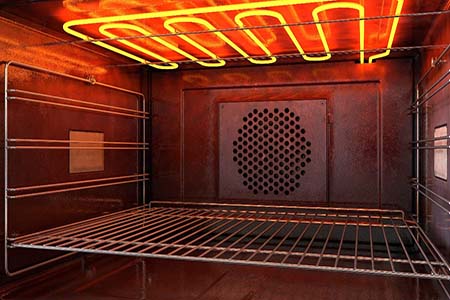
To assess the condition of your heating elements:
- Perform a Continuity Test: Using a multimeter set to the continuity or resistance mode, test the heating elements for continuity. A lack of continuity or very high resistance readings may indicate damage or deterioration.
- Check for Hotspots: During oven operation, observe the heating elements for hotspots—areas that become excessively hot or exhibit unusual coloration. Hotspots can indicate compromised elements.
Thorough Wiring and Connection Checks
Conduct a comprehensive examination of the oven’s wiring and connections:
- Tighten Loose Connections: Ensure that all electrical connections are securely fastened. Tighten any loose wires or connections as needed.
- Inspect Insulation: Examine the insulation around wires and connections. Look for signs of damage or deterioration that could expose conductive components.
Detecting Moisture or Residue Presence
To identify the presence of moisture or food residue:
- Visual Inspection: Look for visible signs of moisture or residue on or near the oven coil. Pay attention to any areas where moisture or residue buildup is evident.
- Touch Test: Use a gloved hand to gently touch areas suspected of having moisture or residue. Be cautious and ensure the oven is powered off. If you detect wet or sticky substances, this could be a source of sparking when heated.
Resolving Oven Coil Sparking
Once you’ve identified the source of sparking within your oven coil, taking prompt action is essential to address the issue effectively. Follow these steps to resolve the problem:
Crucial Safety Precautions When Dealing with Sparking Issues
Before proceeding with any repairs, ensure your safety by following these essential precautions:
- Power Off: Always disconnect the oven from the power source by unplugging it or turning off the circuit breaker. Verify that the oven is completely de-energized before proceeding.
- Wear Protective Gear: When working inside the oven, wear appropriate safety gear, including heat-resistant gloves, safety goggles, and insulated tools.
- Ventilation: Ensure the kitchen area is well-ventilated to disperse any fumes that may be generated during repair or cleaning.
- Avoid Water: Never use water or any liquid on the oven’s interior or components, especially when addressing electrical issues.
Replacing Faulty Heating Elements
If you’ve identified damaged or malfunctioning heating elements as the source of sparking, follow these steps to replace them:
- Order Replacement Elements: Identify the correct replacement heating elements for your oven model and order them from a reputable supplier.
- Power Off: Ensure the oven is disconnected from the power source.
- Access the Elements: Depending on your oven’s design, access the heating elements by removing covers or panels. Refer to your oven’s user manual for guidance.
- Disconnect the Elements: Carefully disconnect the wiring from the faulty heating elements.
- Install New Elements: Attach the new heating elements following the manufacturer’s instructions.
- Reassemble: Reassemble any panels or covers that were removed to access the elements.
- Power On and Test: Reconnect the oven to the power source and test it to ensure the new heating elements are functioning correctly.
Wiring Repairs and Reconnections
If loose or damaged wiring and connections are the cause of sparking, address them as follows:
- Power Off: Ensure the oven is disconnected from the power source.
- Tighten Connections: If you find loose connections, tighten them securely using the appropriate tools.
- Repair Damaged Wiring: For damaged wires or insulation, repair or replace the affected wiring. Use wires of the same gauge and ensure proper insulation.
- Inspect Insulation: Ensure that all wires and connections are properly insulated to prevent contact with metal components.
Addressing Moisture or Food Residue
To address issues related to moisture or food residue:
- Dry and Clean: Thoroughly dry and clean the affected areas to remove any moisture or residue. Use a dry cloth or paper towels for this purpose.
- Avoid Liquid Cleaning Agents: Do not use liquid cleaning agents or water when cleaning the oven’s interior. Stick to dry cleaning methods.
Ensuring Tight Electrical Connections
Ensuring that all electrical connections within the oven are secure is vital:
- Check All Connections: Inspect all electrical connections, including those related to the heating elements, control panel, and wiring harnesses.
- Tighten as Needed: If any connections are loose, tighten them securely to ensure uninterrupted electrical contact.
Preventive Maintenance
Proactive maintenance practices can help you keep your oven in good working condition and reduce the risk of problems like sparking. Implement these preventive measures to ensure the longevity and safety of your appliance:
Regular Cleaning Practices
Maintaining a clean oven is not only essential for hygiene but also for preventing sparking and extending the life of your appliance:
- Regular Interior Cleaning: Periodically clean the oven’s interior to remove food residue, grease, and other debris. Use a non-abrasive cleaner and avoid harsh chemicals.
- Clean Oven Racks: Remove oven racks and clean them separately to prevent any buildup that might interfere with proper heating.
- Clean Control Panel: Wipe down the control panel and digital displays to prevent dirt or residue from interfering with the controls.
- Clean Door Gaskets: Ensure that the door gaskets (seals) are clean and in good condition. Dirty or damaged gaskets can lead to heat loss and inefficient oven operation.
Scheduled Inspection Regimen
Regular inspections can help you catch potential issues before they escalate:
- Heating Element Check: Periodically inspect the heating elements for signs of damage, such as cracks or exposed wires. Replace any compromised elements promptly.
- Wiring and Connections: Check the wiring and connections for tightness and signs of wear or damage. Tighten loose connections and repair or replace damaged wiring.
- Control Panel Inspection: Examine the control panel for any visible damage or irregularities. Ensure that buttons and digital displays function correctly.
- Door Seal Examination: Inspect the door gasket (seal) for any signs of wear or damage. A well-sealed door helps maintain proper cooking temperatures.
Proper Oven Use and Maintenance Tips
Adhering to proper oven usage and maintenance guidelines can significantly extend its lifespan:
- Avoid Spills: Use oven-safe cookware and avoid overfilling containers to prevent spills and food residue buildup.
- Cookware Selection: Use cookware suitable for your oven’s settings and avoid placing foil or metallic objects directly on the oven floor or elements.
- Proper Preheating: Preheat the oven to the desired temperature before placing food inside to ensure even cooking.
- Don’t Slam the Door: Avoid slamming the oven door, as this can damage the door gasket and affect the oven’s performance.
- Scheduled Professional Maintenance: Consider scheduling periodic maintenance by a professional technician to inspect and service critical components.